Backing Up Network Devices With Rancid Opensuse 11 2
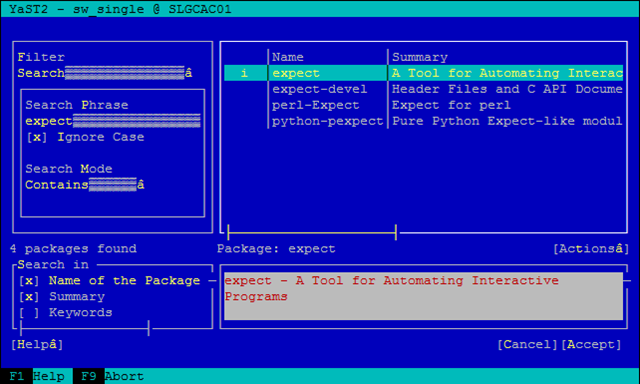
One of the most forgotten backups is that of the network devices, while it can save you a lot of time (thus money) when things get broken. Luckily there is a tool, called Rancid. I’m using it for all our HP and Cisco devices for more then a year now. Officially it was running on a (Ubuntu) test-server which was placed under my desk :-). Not the best place for such a critical server. So now it is time to set-up a “real” management server, which takes care of the network devices backup. Since we already have some Suse servers running, I picked OpenSuse 11.2 as OS for this server. Let’s get started. Before we can install Rancid, we need to install “expect”, this is the language Rancid is written in. The most easy way to accomplish this is by using yast and search for “expect”. Now we have started yast, we also need to install “cvs”, which Rancid uses for file comparison.
Now download Rancid, it can be retrieved from this website. I downloaded it in my home directory under downloads/rancid and unpack it.
wget ftp://ftp.shrubbery.net/pub/rancid/rancid-2.3.4.tar.gz tar -xvf rancid-2.3.4.tar.gz
Go to the unpacked directory and install Rancid.
cd rancid-2.3.4 ./configure make install
If everything went ok, there is a directory created /usr/local/rancid. Since we don’t want to use a root account for Rancid to work, we create a user called rancid and set his home directory to the installation directory /usr/local/rancid. After we created the user, we make him the owner and give right permissions.
useradd -d /usr/local/rancid rancid chown -R rancid /usr/local/rancid/ chmod -R 770 /usr/local/rancid/
Now we can start configuring Rancid. If you’re a real 1337 person, you use vi, but I like nano more, so the next command is.
nano /usr/local/rancid/etc/rancid.conf
What I usually do is create a group for every location, for this go to the line
#LIST_OF_GROUPS=”sl joebobbisp”
and change it to.
LIST_OF_GROUPS=”Headquarters” LIST_OF_GROUPS=”$LIST_OF_GROUPS Location1” LIST_OF_GROUPS=”$LIST_OF_GROUPS Location2” …
Now let’s run Rancid CVS to create the directories and configuration files for the locations. We do this with the Rancid user.
su – rancid ./bin/rancid-cvs
If you now look in the /usr/local/rancid/var/ directory, you should see the directories which Rancid created by following the rancid.conf file. Additional there are two directories created, “CVS” and “logs”. Within the location directory there is a file, called router.db, this file contains all the routers off that location, which we like to back-up. Since Rancid has no idea by itself, what we like to back-up we need to add these devices ourselves.
cd location nano router.db
Type the following lines, replace the “core” and “distr” with your own names or IP address. My advice is to take DNS names, cause it is more clear then IP addresses, also the name or IP is used to create filenames which contains the actual configuration.
#Devicename or IP : Devicetype : Up CORE:HP:UP DISTR:CISCO:UP
As you probably already guessed, the # is used for comments. Now there is only one thing left. Rancid needs credentials to get access to the device. We create a file in the home directory of the rancid user and since we’re running the command as the user rancid, the command is very simple.
nano ~/.cloginrc
Let’s add the following lines for general access and one specially for the core.
#Specific location/device add password core verydifficultandlongpassword #General add password * asimplepassword add method * telnet add autoenable * 1
Unfortunately Linux thinks that this file may be read by everyone, we definitely don’t want this and rancid will even give an error on this, so we need to make sure this file is only readable by the rancid user and the group root.
chmod 770 ~/.cloginrc
Now we can test Rancid by running it.
~/bin/rancid-run
When it is done, check the config directory in the ./var/location directory and see if there is a file placed, use cat to check if the configuration is actually in i.
cd ~/var/location1/config ls cat core
Congratulations! If everything went ok, you now should see the configuration of the switch you backed upped with Rancid. If you don’t see the configuration, go to the var/logs directory and see if you can find out what went wrong in the log.
cd ~/var/logs ls less location1.20100825.160011
But we ain’t there yet, of course we like to automate this process. This is fairly simple, cause we have created a user, this user has his own cron.
crontab –e
In my case it is enough to make a daily back-up, but this is of course your own decision.
@daily /usr/local/rancid/bin/rancid-run @daily /usr/bin/find /usr/local/rancid/var/logs -type f -mtime +1 -exec rm {} ;
The second line deletes log files, older the 2 days. Now we’re done with Rancid. The next step is create a nice web interface for configuration comparison and something we do is mail all the configurations to our support partner weekly. So when there is trouble they also have the latest configurations. I’ll cover these steps later on.