Nested Nsx Vmware Nsx on Intel Nuc Lab Setup Part 2
In my previous post I described how to create a nested ESXi environment, connected to a vCenter, this as a preparation to run eventually NSX. In this post we will build further on the basic set-up we created in part 1 of this series. At the end of this post we will have the NSX installed and the network prepared for all the cool things NSX can do.
Distributed Switch
Since the NSX vSwitch is based on the “distributed switch”, this is what we are going to create first on the two clusters. We will make two distributed switches, named;
- dsMgmtEdge
- dsCompute1
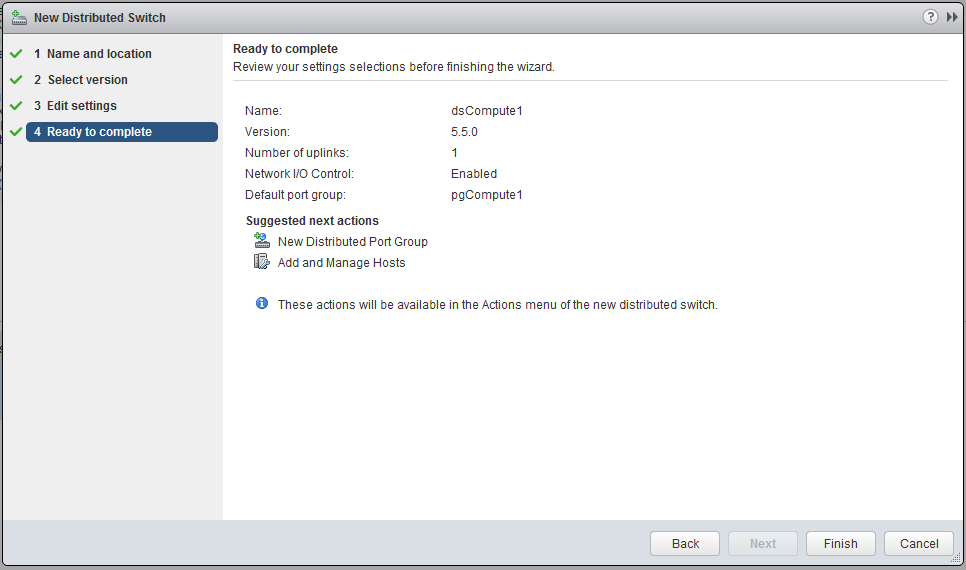
Go to your (LAB) vCenter and go to the networking tab, right click on the Datacenter and click on “New Ditributed Switch”, for now the following options are sufficient.
- Number of uplinks: 1
- Network I/O control: Enabled
- Default port group: Create a default port group
- Port group name: pgManagement / pgCompute1
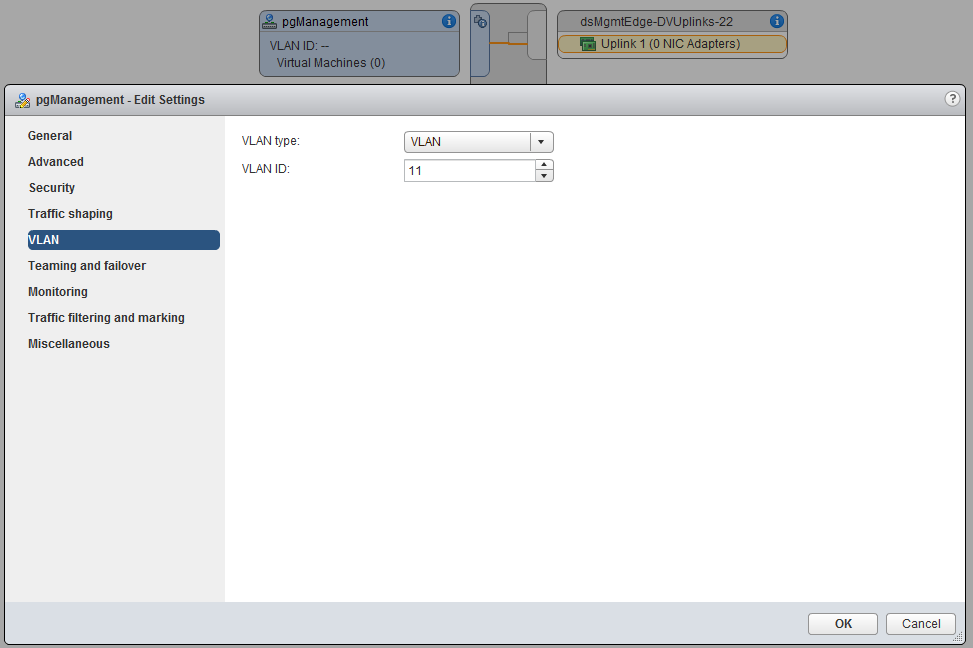
Before we can actually add hosts to the distributed switches we created, we need to add the VLAN tag to the newly created port-groups. Therefore select the distributed switch, choose the manage tab and make sure settings is selected. Select the port-group and click edit settings. Under the VLAN settings, choose VLAN and enter the appropriate VLAN ID. (if you don’t work with VLANs you can skip this step)
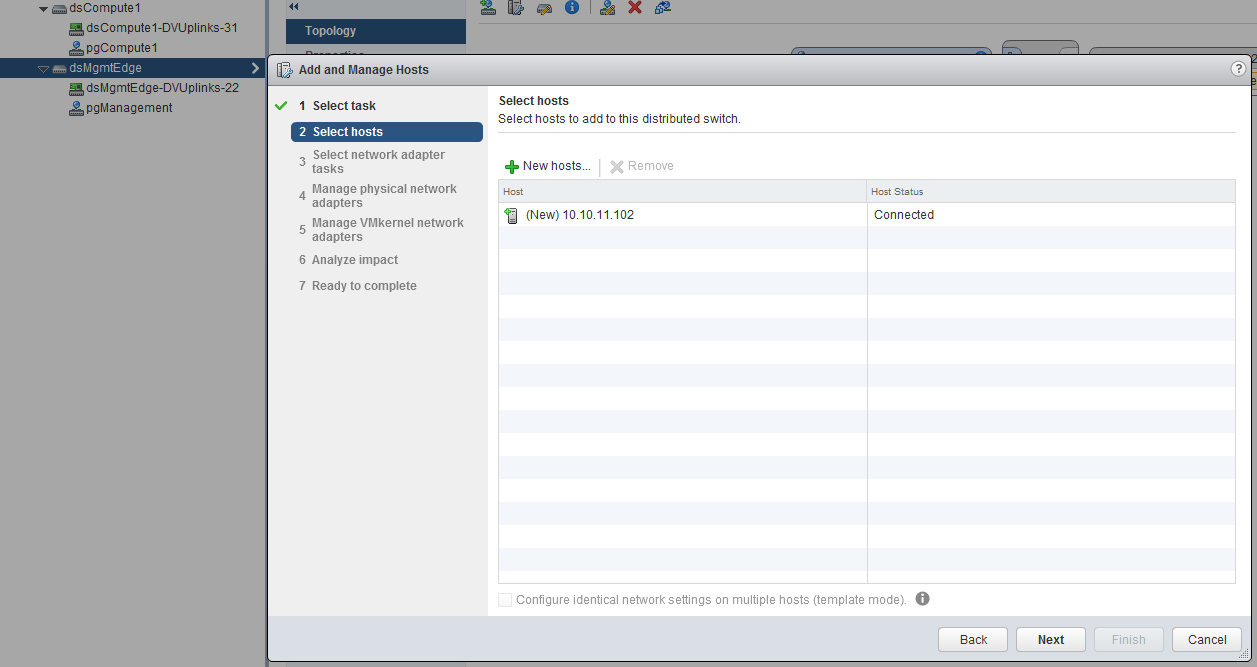
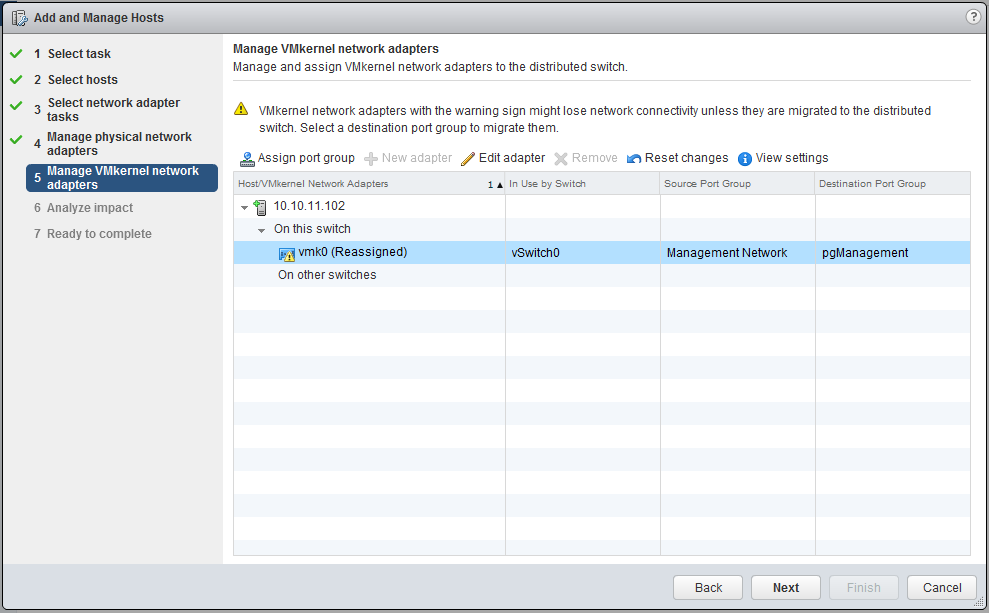
Now we have created the distributed switch and configured the port-group, we need to add the hosts to it. Right click on the distributed switch and click on “Add and Manage Hosts”, we want to add the host, select the appropriate host.
Make sure both the “Manage physical adapters” and “Manage VMkernel adapters” are both checked. We will move the vmnic0 to the uplink of the distributed switch.
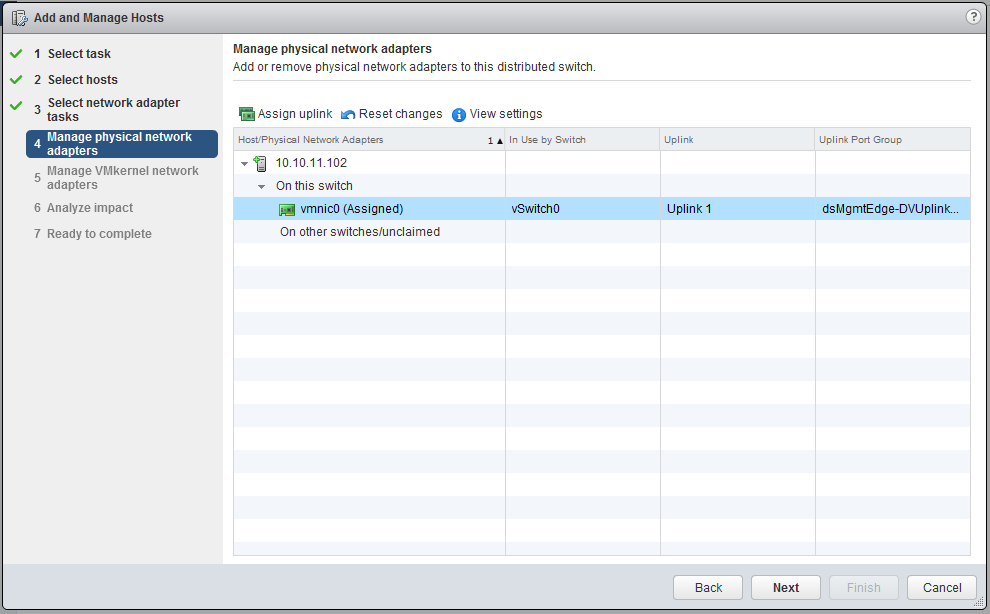
Also move the VMkernel adater (vmk0) to the new port group.
If you screw this up, it is pretty easy to start over by accessing the console of the ESXi and in the settings, choose “Network Restore Options”.
NSX Manager
Finally we can start with some real NSX stuff. The first step is the installation of the NSX Manager. Go to hosts and clusters, right click the “Management & Edge” cluster and choose deploy OVF. Point to the NSX Manager OVA. Select Accept extra configuration options.
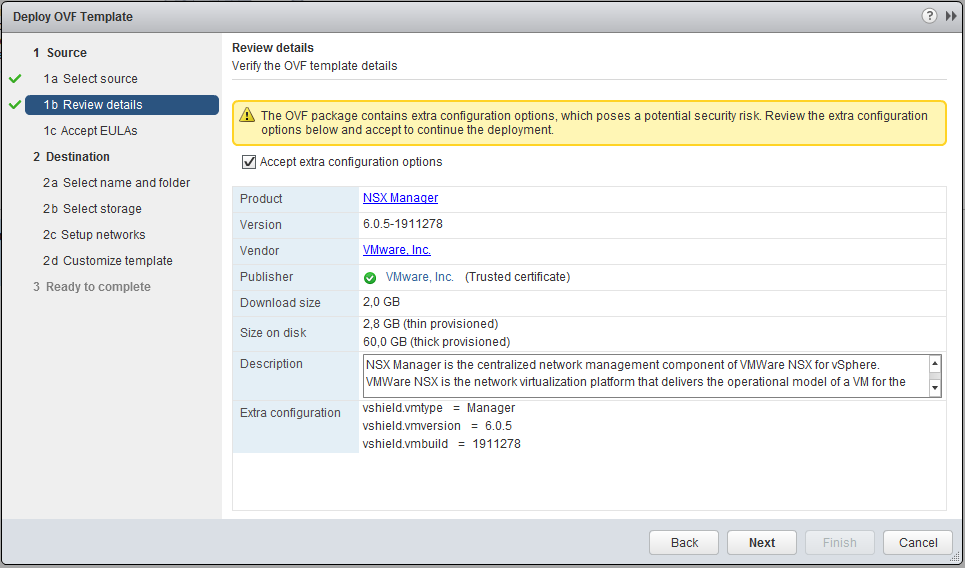
Read & accept the EULA, pick a name (i.e. LAB NSX Manager). At the Network setup make sure you choose the new “pgManagement” port-group. At the “Customize template”, set some passwords and make the network configuration.
- VSMgmt: pgManagement
- Hostname: LABNSXManager
- Network 1 IPv4: 10.10.11.111
- Network 1 Netmask: 255.255.255.0
- Default IPv4 Gateway: 10.10.11.1
- DNS server list: 10.10.11.3, 8.8.8.8
- Enable SSH: checked
The settings I didn’t mentioned I left blank.
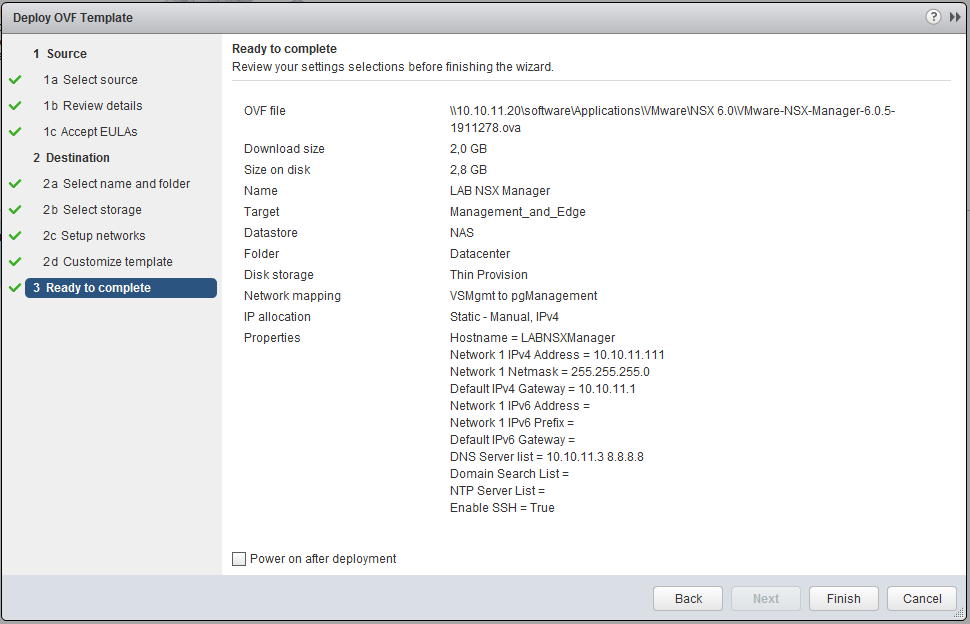
Click finish and have a bit of patience. Before we can power up the NSX manager we need to do something about the resources which are by default quite heavy and we simply have not that many resources available on our LAB set-up. Edit the VM hardware settings with the following values.
- CPU: 2 (instead of 4)
- Memory: 4GB (instead of 12)
- Memory reservation: 0 (instead of 3GB)
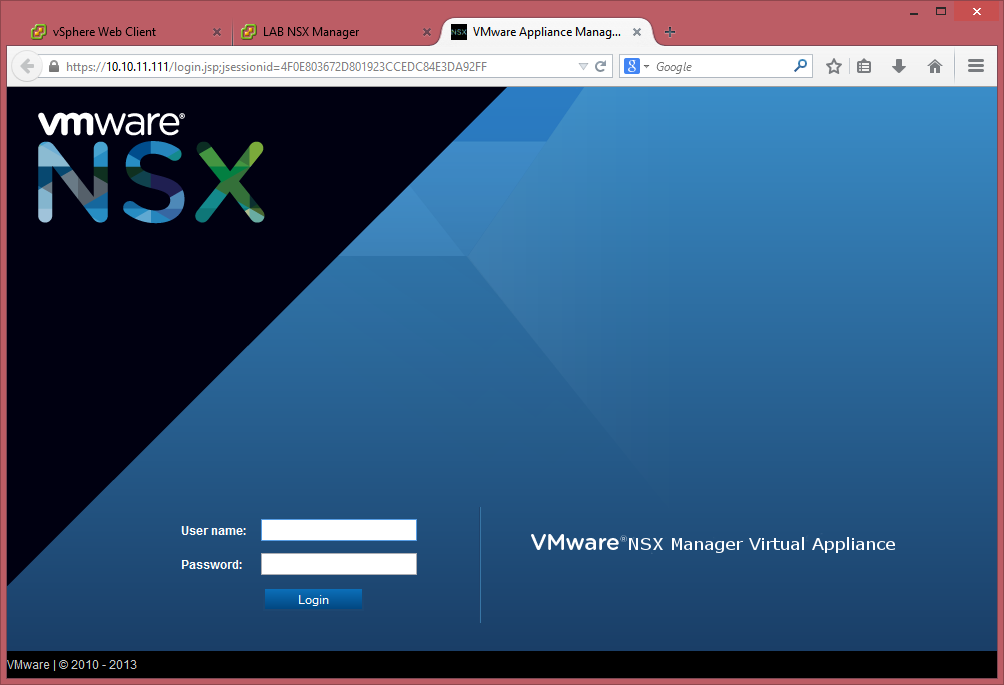
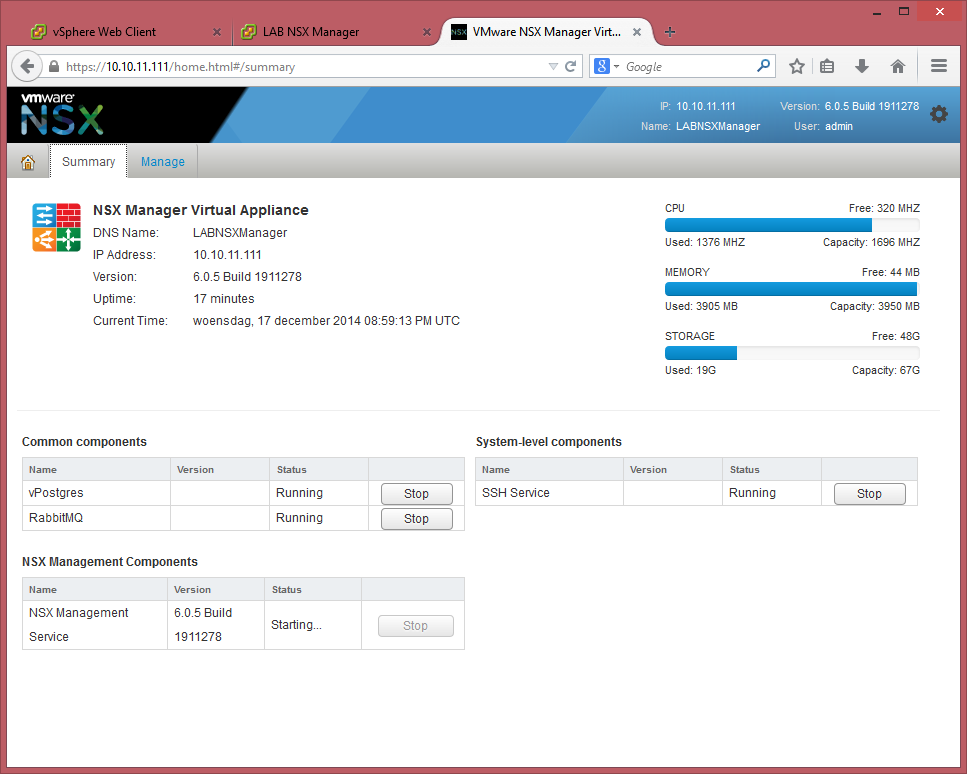
Power up the NSX manager and if everything went well, you will be able to visit the NSX page with a few minutes, https://IPAddress and you can log in with the username “admin” and the password specified during the deployment.
Before we continue, I noticed that the resources are a bit short, cause after 17 minutes, the NSX Mangement Services wasn’t started and it would eventually turn out to take 19 minutes. As you can see the Memory is in full use and also on the ESXi host we can see this, this is an indication that we need to increase the memory of the ESX02 (the host of the Management & Edge) cluster. Cause it is also going to run the NSX Controller(s). Luckily this is a virtual ESX host, so extending the memory is quite easy, I doubled it at this moment to 8GB. I didn’t increase the memory of the NSX Manager, since this is a LAB, I don’t care if the start-up takes a while, as long it will run fluent enough to do some testing.
vCenter integration
NSX has a tight integration with vCenter, at this moment it is an 1 on 1 relationship, which means for every vCenter, you need one NSX Manager. Log in to your just deployed NSX Manager and click on “Manage vCenter registration”, click on edit and enter your vCenter information.
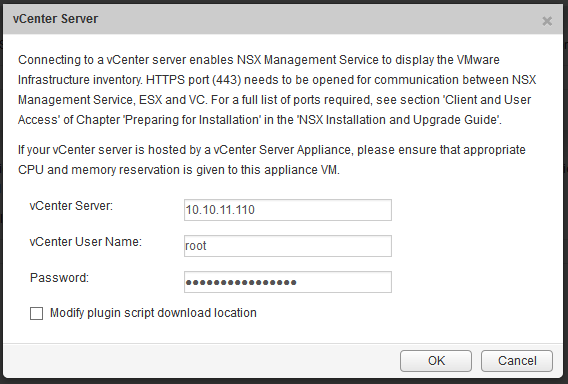
After clicking ok, trust the certificate and within a few seconds it should say that is is successfully connected.

Now we are going back to our vCenter, if you are already logged in, log out and log in again. The first time it can take a few minutes, cause it will configure itself for NSX. If everything went fine you should see a new option in the menu on the left, named “Networking & Security”.

Prepare the hosts
The next step is to prepare the host, NSX will install a couple of VIB’s into the hosts, knowing;
- Logical Routing
- Distributed Firewall
- VXLAN
Click on the new “Networking & Security” option and go to “installation”, click the “host preparation” tab. It will show the clusters available within the vCenter.

Click the install link in the column “Installation Status”, do this for both clusters. After the installation it should say “ready” on the particular host and the version for the cluster.

Controller
Now that the hosts are ready we can start deploying the controller(s), normally you would deploy at least 3 controllers, but in this LAB we will start with just one, mainly due resource restrictions. The controller is the control plane of the environment and will keep three primary tables.
- ARP table
- MAC table
- VTEP table
Go back to the “Management” tab of the “Installation” settings and click on the green plus sign, below NSX Controller Nodes. Fill in the following.
-
NSX Manager: 10.10.11.111
-
Datacenter: Datacenter
-
Cluster: Management_and_Edge
-
Datastore: NAS
-
Host: 10.10.11.102
-
Connected to: pgManagement (select distributed switch)
-
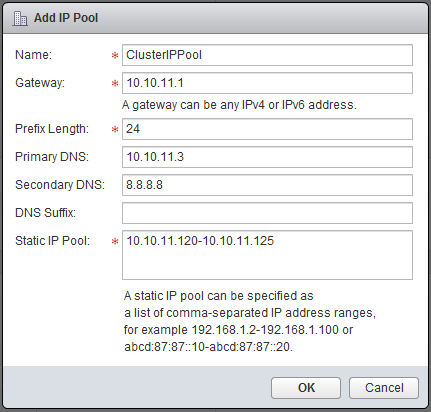
IP Pool: ClusterIPPool - Create one
- Name: ClusterIPPool
- Gateway: 10.10.11.1
- Prefix Length: 24
- Primary DNS: 10.10.11.3 -> Your own DNS server
- Secondary DNS: 8.8.8.8
- Static IP Pool: 10.10.11.120 - 10.10.11.125
- Password: Pick Something
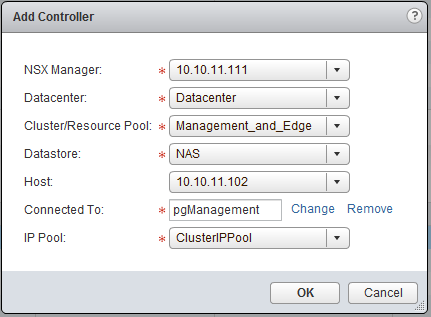
Click OK, it will start deploying a controller and this can take a while.

VXLAN
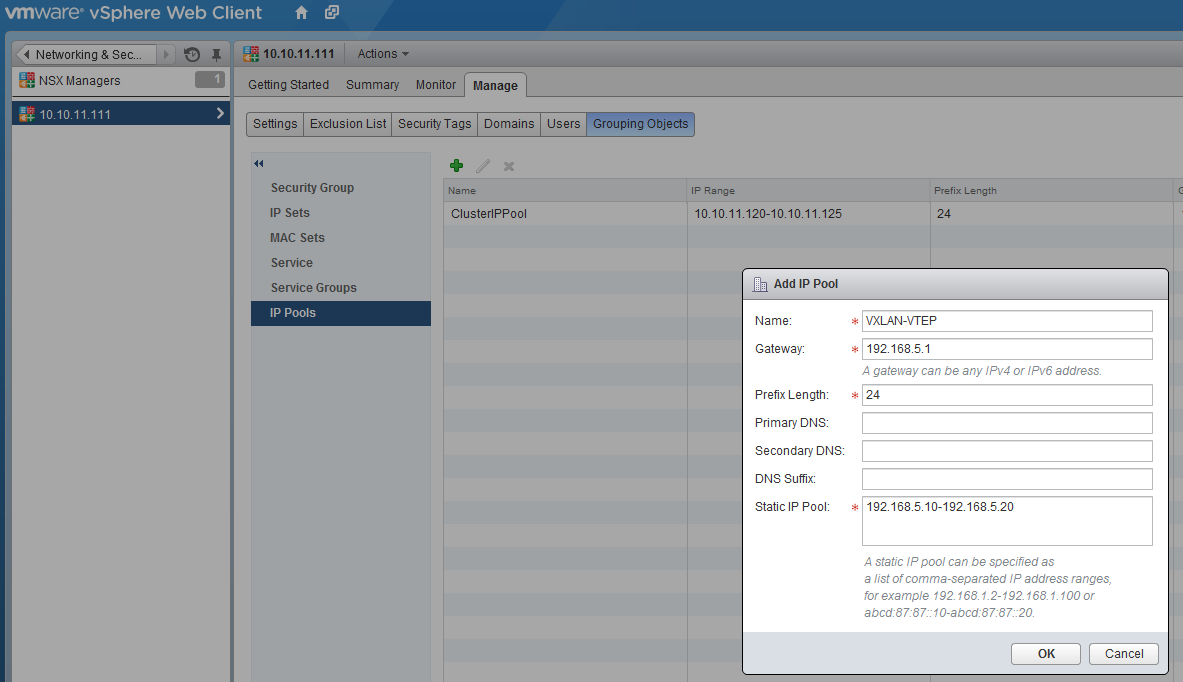
The last step in the preparation of the NSX environment is the VXLAN preparation, VXLAN is the tunnel protocol which makes sure every host participating in the NSX environment is able to communicate with each other. First we going to create an IP pool, with the IP adresses for the VMKernel adapters serving the VTEP (VXLan Tunnel End Point). Therefore click in the left bar on NSX Managers and select “10.10.11.111”, make sure the “Manage” tab is selected and click on “Grouping Objects”, select IP-Pools and click on the green plus sign. To show that communication between the hosts is really independent of the underlying network, I created a separate subnet without a default gateway (although specified).
- Name: VXLAN-VTEP
- Gateway: 192.168.5.1
- Prefix Length: 24
- Static IP Pool: 192.168.5.10-192.168.5.20
Now go back to the installation, “Host Preparation” tab and in the column VXLAN click “configure”.

Leave everything default except:
- VLAN: 5
- IP Addressing: Use IP Pool
- IP Pool: VXLAN-VTEP
Click ok and wait a few seconds, although it could give an error (didn’t find out why yet), the error will dissappear after a refresh.

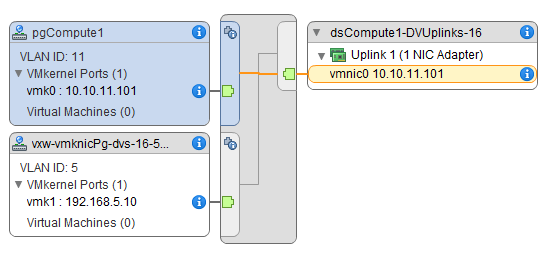
If you go to the distributed switch of one of the cluster you should see something as follows:
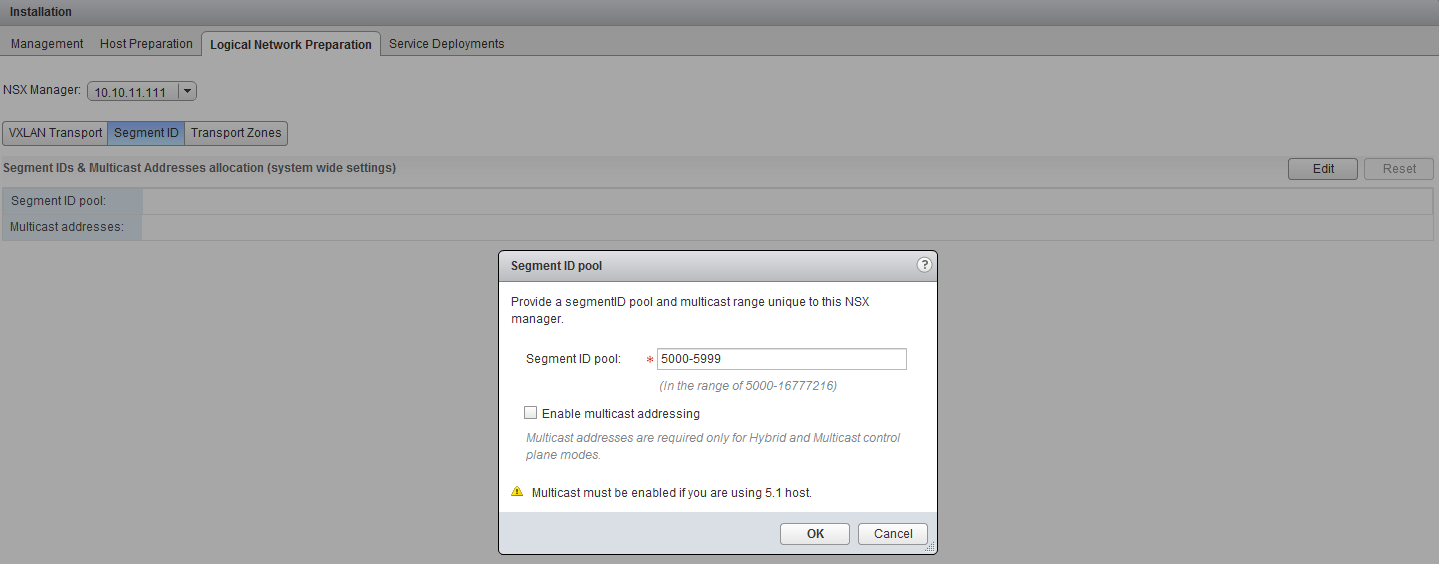
Now we need to specify the VXLAN segment ID’s, therefore go to the “Logical Network Preparation” tab in the installation settings, select “Segment ID” and click edit. Fill in the following segment ID pool, which should be more than enough for this lab environment.
- Segment ID Pool: 5000 - 5999
We don’t have to enable multicast, since we are running on ESXi 5.5 hosts.
The last part is to create a “Transport Zone”, this will tell NSX which clusters are able to communicate with each other. Click on “Transport Zones” and click the green plus sign.
- Name: LAB-Zone
- Control Plane Mode: Unicast
- Clusters: Select both
Now we have everything prepared to do some actual networking with NSX. This is what we will be doing in my next blog post.