Switch Rancid to SVN and View Your SVN DB With WebSVN
In the previous blog I explained how you can use Rancid to create back-ups of your network devices. Now I will explain how you can create a website where you can view the configurations and compare them with previous versions. This can be a powerful tool for solving problems.
Since I like SVN more then CVS as a version control system, I go for SVN with WebSVN as GUI. Everything is running on a virtual machine running OpenSuse 11.2.

In the previous blog, Rancid was configured with CVS, since this is the default setting. So first of all we need to change this to SVN. For this, go to the Rancid directory and change the following lines in the rancid.conf configuration. For safety, make sure you’re using the rancid user.
su – rancid
nano etc/rancid.conf
_rancid.conf_

RCSSYS=**svn**; export RCSSYS

CVSROOT=$BASEDIR/**SVN**; export CSVROOT
This is all we have to change for rancid to use SVN. Now the CVS repository is superfluous. For safety reason I deleted al the files and directories within the var directory. If you added a lot or devices to the router.db file(s), you may want to back-up them.
rm –Rf ~/var/*
Now we run “rancid-cvs” to create new folders and a new SVN database.
~/bin/rancid-cvs
Fill up router.db or replace the new created one, with a back-up. Unfortunately it seems there is a little bug in version 2.3.4 of Rancid, which corrupts the SVN database after editting router.db. This can easily being solved with the command “svn update”.
cd ~/var/location
nano router.db
svn update
After this we are done with the Rancid part. Next is installing and configuring WebSVN. Make sure you have installed Apache. It can be found in the repositories of OpenSuse, unfortunately WebSVN can’t.
Logout as the rancid user and go to your own homedirectory.
exit
cd ~
Now download (the latest) WebSVN which can be found on http://www.websvn.info/. Extract the file and copy it to a “logic” location, I use /usr/local/websvn and set the permission for the web server.
wget [http://websvn.tigris.org/files/documents/1380/47525/websvn-2.3.1.tar.gz](http://websvn.tigris.org/files/documents/1380/47525/websvn-2.3.1.tar.gz)
tar xvf websvn-2.3.1.tar.gz
mkdir /usr/local/websvn
cp –R ~/websvn-2.3.1/* /usr/local/websvn/
chown wwwrun:www /usr/local/websvn
Now we need the configure apache so we can access the websvn website. I use a virtualhost for this, cause I’m also running Cacti on this server.
Create a file in the directory /etc/apache2/vhosts.d/ and add the configuration to it. You may also make a copy of the vhost.template, but I think it is a bit overwhelming for such an easy site like WebSVN. Make sure you have enough rights to edit this file.
nano /etc/apache2/vhosts.d/websvn.conf
_websvn.conf_

<VirtualHost *:80>
        ServerName switchsvn
        Documentroot /usr/local/websvn
        <Directory "/usr/local/websvn/">
                Options Includes Indexes
                Order allow,deny
                Allow from all
        </Directory>
</VirtualHost>
If you restart apache, this configuration is loaded. I added switchsvn to our DNS to access this site, but you can offcourse always edit you hosts file, to test.
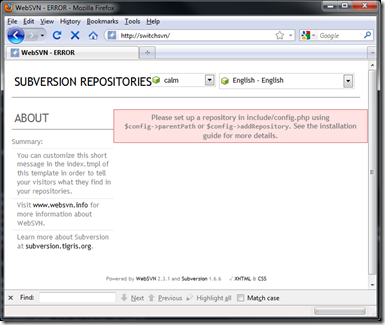
If you now go to http://switchsvn, you should see the Websvn website. If not, check if the firewall is not blocking port 80. You can also check if the server is listening on port 80, with netstat –nat. If it isn’t, you should check the /etc/apache2/listen.conf file.
The last step in the configuration is to point WebSVN to the SVN database and grant the webserver enough rights to work with SVN within the SVN repository.
First we need to copy the initial configuration file and second we need to modify it and tell it where the repository can be found.
cp /usr/local/websvn/include/distconfig.php /usr/local/websvn/include/config.php
nano /usr/local/websvn/config.php
_config.php_

$config->addRepository('Switches', 'file:///usr/local/rancid/var/CVS/');
To make sure the webserver has enough rights I added the wwwrun user to the users group. I can imagine that for security reasons you create(d) a group networking.
usermod –A users wwwrun
If you now access the website, you should see the repository and you can browse through configurations and compare them with previous versions.